
Avoid These Common Mistakes During iPhone Glass Replacement
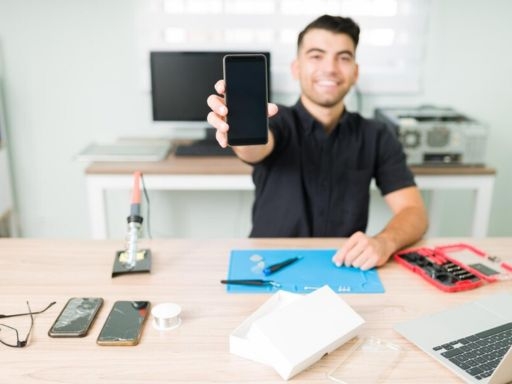
The elegant design and high-quality display capabilities of iPhones makes them among the most popular smartphones around the world. But even when you take the greatest care of them there are accidents that happen and damaged screens are among of the biggest problems that are that are faced with iPhone users. iPhone glass replacement is a nitty-gritty procedure that requires attention to detail knowledge, technical skills, and attention to details. If you're trying an DIY repair or requesting professional assistance, there are a few errors that are made in the course of their work that could transform a straightforward repair into costly hassle.
Recognizing these errors as well as the best way to avoid them could reduce time and cost and preserve the integrity of the device. In this piece we'll look at some of the biggest mistakes that occur during your iPhone replacing glass procedure, their ramifications and the best way to prevent these mistakes effectively.
1. Not Diagnosing the Full Extent of the Damage
The most often overlooked factors that screen damage can be overlooked is the assumption that it's just the glass has been damaged. The damage may go deeper inside the screen. Under the glass is the digitizer, which regulates functions that touch can perform, as well as the LCD panel which is used to display pictures. If the screen for touch is not responsive or the screen has lines or color replacement of the glass may not be sufficient.
Incorrectly diagnosing the issue could cause inadequate repairs or the requirement to get a new replacement shortly after. Prior to beginning on the iPhone repair It is crucial to know if the problem is also affecting the digitizer or LCD, so that you avoid repair work that isn't complete and won't restore the full function of the device.
2. Using Substandard Replacement Parts
The quality of the product is crucial when replacing parts. The most common and destructive mistakes that happen when it comes to iPhone replacement of glass is to use components that are of poor quality or made from counterfeit materials. They may cost a lot less but often come with poor quality displays, issues with display, or the lag of touchscreens. These could cause additional internal harm over the course of the course of.
Make sure that the components that are used in the repair process are high-quality and, where feasible the OEM (original manufacturer of the equipment) of the highest quality. This will ensure the efficiency, clarity of display and the touch-responsiveness of the device.
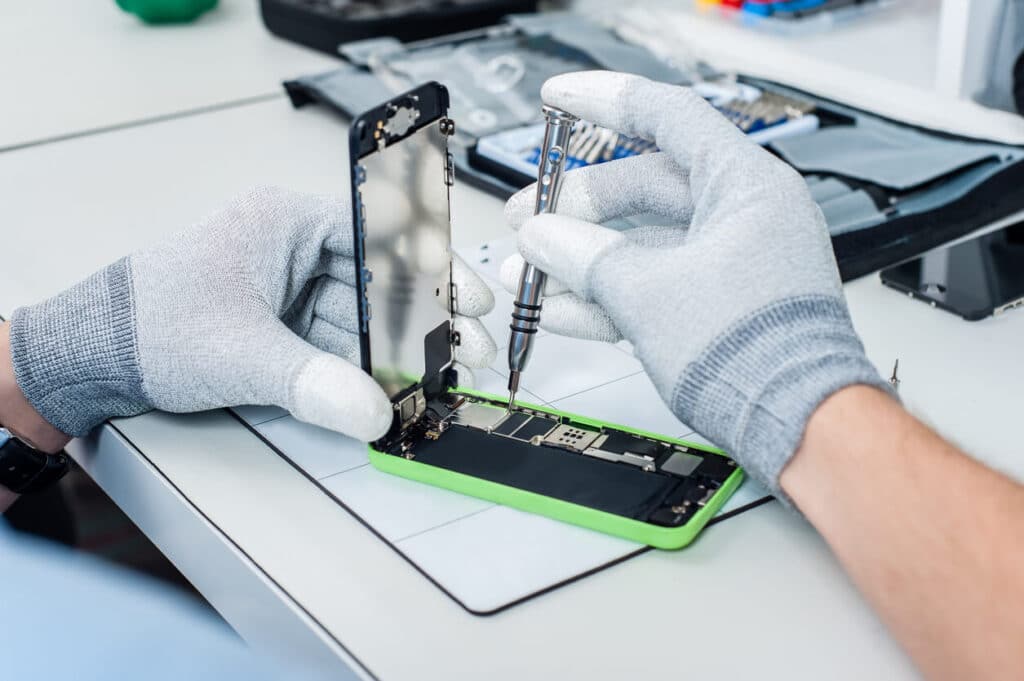
3. Attempting DIY Repairs Without Sufficient Knowledge
The web is full of DIY repair guides that, while they might appear straightforward for you to learn, iPhone glass replacement is a very complicated procedure. An error in the application of too much heat, placing tools into the wrong location or applying an adhesive that is not appropriate can irreparably damage your phone's internal parts.
DIY repairs that are not accompanied by an in-depth grasp of iPhone devices, tools or a proper method can lead to additional problems. A lot of users damage their logic boards, facial recognition devices, and even the battery. If you don't have previous expertise or have a formal education It's usually safer to let an experienced person.
4. Ignoring Proper Tool Requirements
iPhones are constructed by hand, and each element is joined using specific connectors and screws. If you attempt to make an iPhone replace the glass by using tools from the generic range or other household tools could cause a deterioration of connectors, damaged screws or even short circuits.
Each version of iPhone is different in terms of equipment like suction cups Pentalobe screwdrivers and opening picking tools and Spudgers. If you don't have the right tools it is possible to be causing more harm than good. This can result in the repairs much more complex and expensive in the end term.

5. Not Disconnecting the Battery Before Starting the Repair
It is among the most crucial steps, that many do not remember. Inadvertently disconnecting the battery prior to performing any work on the device could cause damage to components, short circuits and even electroshock. iPhones have a higher chance of static injury, as well as any electrical power that is running through the motherboard in the process of repair could lead to a catastrophic hardware malfunction.
It is important to first disconnect the battery and make sure you're operating in a safe environment for electrostatic discharge. This simple precaution can prevent major issues and is a must in any i phone screen repairs or replacement procedures.
6. Rushing the Reassembly Process
Following this iPhone glass repair It's tempting to speed through the reassembly procedure in excitement, to check whether the phone is working again. Reassembling the phone in a hurry can result in broken screws, faulty alignment of components, or malfunctioning features.
Each connector should be repositioned in its precise position and the screws should be tightened to the right amount of torque. Incorrect reassembly could lead to problems with face recognition problems with the proximity sensor and even complete failure. Be sure to be sure to double-check each step and be sure that everything is placed before switching the device on again.
7. Failing to Test the Device Before Closing It Completely
The most frequent mistake that is made in iPhone Glass replacement is the failure to test the phone prior to closing it. After you've connected all of the elements, but prior to tightening the last couple of screws and sealing the frame must test the display's functionality and responsiveness to touch as well as camera performance and audio output.
When you do this by doing this, you can ensure that all parts work properly and spot any problems early, avoiding having to open the device. A failure to conduct tests properly can result in repeating the whole repair procedure over and over, creating a greater risk of injury and frustration.
8. Not Cleaning Internal Components
In the course of screen repair or replacements the fingerprints, dust as well as small pieces of debris may build up within the phone, particularly close to the lens of the camera or the display panel. Failure to clear these areas prior to closing the phone can cause blurred images or poor quality display or even touch problems.
Utilizing microfiber-based cloths, antistatic brushes as well as compressed air, is an easy but efficient method to ensure that the interior components in good condition during repairs. Clean working environments is a huge improvement in the final results of a repair.

Conclusion
Removing the glass from the iPhone could seem easy However, it's actually a complicated procedure with a myriad of risks. By using improper components and tools to not recognizing important safety precautions such as disconnecting the battery This can result in more than the initial repair.
If you're an experienced technician or an experienced DIYer, knowing the most common errors that occur during replacing the glass of your iPhone will aid you in avoiding mistakes and ensure a efficient repair. Make sure you take your time, employ appropriate tools, make sure that you're using only the best parts make sure you double-check the repair. If you are meticulous and knowledgeable to extend the lifespan of your phone and make sure that repair of your phone's screen will produce a functioning, secure, and appealing phone.
Frequently Asked Questions
1. Can I replace just the glass on my iPhone without replacing the LCD? Sure However, it is only possible in the event that the digitizer and LCD work properly. Separating between the display and glass needs the use of specialized equipment and knowledge. It's generally not suggested as a DIY project.
2. How do I know if my iPhone screen needs full replacement or just glass repair?
If the screen is functioning properly and the touch responds it is possible that a repair using glass be an option. However, lines appearing on the screen, discoloration or issues with touch indicate that the LCD or digitizer may be damaged, and will require an entire screen replacement.
3. Is it safe to use third-party glass for iPhone screen repairs?
Even though the majority of third-party glass is reasonably priced, the majority are not up to par. You should use premium or OEM-grade parts to prevent any further harm or a decrease in performance.
4. What are the risks of DIY iPhone glass replacement?
The most common risks are damage to internal parts, breaking connectors or creating the short circuit. A lack of experience can result in cost-savings that are far greater than what is required for a expert repair.
5. How long does a proper iPhone glass replacement take?
An experienced technician could typically complete the task within a matter of minutes. Repairs made by yourself can take a few hours, based on the level of familiarity you have with equipment and procedure. Make sure you test the repair thoroughly before declaring that the repair is complete.
- Questions and Answers
- Opinion
- Motivational and Inspiring Story
- Technology
- Live and Let live
- Focus
- Geopolitics
- Military-Arms/Equipment
- Segurança
- Economy
- Beasts of Nations
- Machine Tools-The “Mother Industry”
- Art
- Causes
- Crafts
- Dance
- Drinks
- Film/Movie
- Fitness
- Food
- Jogos
- Gardening
- Health
- Início
- Literature
- Music
- Networking
- Outro
- Party
- Religion
- Shopping
- Sports
- Theater
- Health and Wellness
- News
- Culture