
How to Record Saxophone on GarageBand: A Complete Guide
Recording saxophone on GarageBand may seem simple, but achieving a professional sound requires attention to detail, the right setup, and proper technique. GarageBand, Apple’s versatile digital audio workstation (DAW), offers a range of tools that can capture the full tone, warmth, and expression of your saxophone performance. In this guide, we will cover everything from equipment selection to mixing, ensuring your recordings are clean, dynamic, and studio-ready.
Understanding the Challenges of Recording Saxophone
The saxophone is a dynamic instrument with a wide tonal range, from soft, breathy lows to bright, powerful highs. Capturing these nuances digitally can be tricky due to:
Dynamic range: Saxophones can fluctuate drastically in volume, which can overload the input or sound weak if the gain is too low.
Overtones: Saxophones produce complex harmonics that require careful mic placement to capture the true tone.
Room acoustics: The environment affects the sound; small rooms can create unwanted reflections, while untreated spaces can muddy the recording.
Addressing these challenges early ensures a better recording workflow on GarageBand.
Required Equipment for Saxophone Recording
Before opening GarageBand, gather the following essentials:
1. Microphone
A high-quality condenser or ribbon microphone is preferred for saxophones. Condenser mics are sensitive and capture detail, while ribbon mics provide warmth and reduce harshness.
2. Audio Interface
An audio interface converts the microphone’s analog signal into a digital signal for GarageBand. Look for interfaces with low latency and high-quality preamps.
3. Cables and Stands
Use balanced XLR cables to minimize noise. A sturdy mic stand with a boom arm allows precise positioning.
4. Headphones
Closed-back headphones help monitor recordings without causing bleed into the mic.
5. Pop Filter or Wind Screen
Though more common for vocals, a pop filter or windscreen can reduce harsh breath sounds and sibilance when recording saxophone.
Setting Up Your Saxophone Recording Environment
The room and setup play a major role in the quality of your saxophone recording:
1. Room Acoustics
Choose a quiet room with minimal reflective surfaces. Carpeted floors, curtains, and soft furnishings can help control reflections. For larger rooms, experiment with mic placement to avoid echoes or room reverb overpowering your saxophone’s tone.
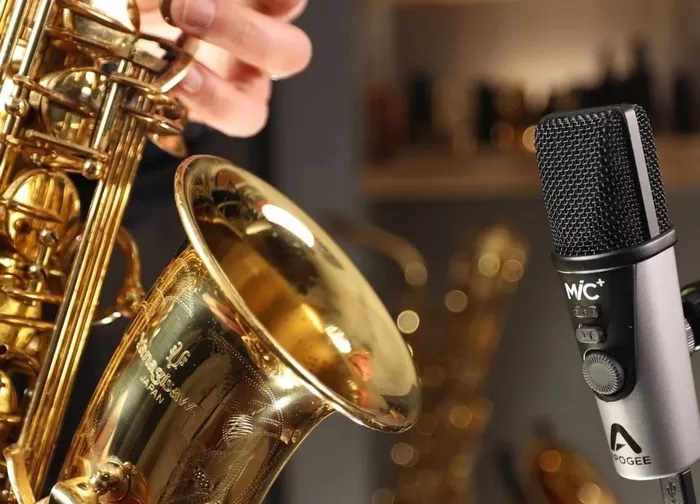
2. Microphone Placement
Position the mic 6–12 inches away from the bell, slightly off-axis to avoid harsh air blasts. You can also experiment with angling the mic to capture more of the body and warmth of the instrument.
3. Instrument Position
Play naturally, maintaining consistent dynamics. Avoid pointing the bell directly at reflective surfaces to reduce harsh reflections.
Configuring GarageBand for Saxophone Recording
Once your environment is ready, configuring GarageBand properly is crucial for clean recordings.
1. Create a New Project
Open GarageBand and select “Empty Project.” Choose “Audio” for recording a real instrument, and ensure “Input” is set to the correct audio interface channel.
2. Track Settings
Select “Record Enable” on your track. Choose “Monitor” to hear your saxophone through headphones in real-time. Set the track to mono if using a single mic, which simplifies mixing later.
3. Sample Rate and Bit Depth
Set GarageBand to a standard 44.1 kHz sample rate and 24-bit depth. This captures sufficient detail and headroom for dynamic performances.
4. Input Gain
Adjust your audio interface input gain so peaks do not clip. Aim for levels around -12 dB to -6 dB for a clean signal while leaving headroom for expressive passages.
Recording Techniques for Saxophone
1. Warm-Up
Warm up your saxophone thoroughly before recording. This ensures consistent intonation and tone quality, reducing the need for multiple takes.
2. Mic Distance and Angling
Experiment with mic distance and angle. Closer mic placement emphasizes brightness and detail, while a slightly distant mic captures more room ambiance and natural warmth.
3. Dynamics Control
Play with consistent dynamics to avoid sudden volume spikes. If the piece requires extremes, adjust gain carefully or consider using a compressor plugin after recording.
4. Multiple Takes
Record multiple takes to capture the best phrasing and expression. GarageBand allows comping, so you can edit together the best parts of each take.
Using GarageBand Effects for Saxophone
GarageBand offers built-in effects to enhance your saxophone sound:
1. EQ
Use EQ to remove unwanted frequencies. Cut low rumble under 80 Hz, slightly boost presence around 2–5 kHz, and gently enhance warmth in the 200–400 Hz range.
2. Compression
Compress the saxophone to even out dynamics. Use a low ratio (2:1 or 3:1) and a slow attack to preserve natural transients while controlling peaks.
3. Reverb
Add subtle reverb to emulate a natural performance space. Avoid excessive reverb which can wash out articulation.
4. Modulation and Delay
GarageBand offers chorus and delay effects. Use sparingly to add depth or create ambient textures without overwhelming the saxophone’s tone.
Recording Workflow Tips
Track Organization: Keep saxophone on a dedicated track with a clear naming convention.
Use Markers: Set markers in GarageBand to navigate sections of your song for precise edits.
Backup Takes: Save multiple versions of your project to prevent data loss.
Silent Practice: Record a rough practice take to ensure settings are correct before final recording.
Editing Saxophone Recordings in GarageBand
After recording, GarageBand provides simple yet powerful editing tools:
1. Comping Takes
Use multiple takes to create a composite performance. Select the best phrases from each take using the “Track Alternatives” or editing lanes feature.
2. Timing Adjustments
Use Flex Time to adjust note timing without altering pitch, ensuring tight synchronization with other instruments.
3. Pitch Correction
GarageBand’s pitch correction can subtly fix intonation issues. Apply lightly to preserve the saxophone’s natural vibrato.
4. Automation
Automate volume, panning, or effects to enhance expressiveness. This allows dynamic shaping across the performance.
Mixing Saxophone with Other Instruments
When combining saxophone with other instruments in GarageBand, consider:
Panning: Place the saxophone slightly off-center to create space in the mix.
EQ Carving: Reduce frequencies in other instruments where saxophone sits to prevent masking.
Reverb Matching: Use a consistent reverb space to maintain cohesion.
Level Balancing: Keep the saxophone prominent without overpowering vocals or lead instruments.
Exporting Your Saxophone Track
After editing and mixing, export your track in GarageBand:
1. Export Settings
Choose “Share” > “Export Song to Disk.” Select WAV or AIFF for high-quality audio. For online sharing, MP3 is sufficient.
2. Metadata
Add track name, artist, and other metadata if exporting for digital distribution.
Advanced Tips for Professional Saxophone Recording
Layering: Record multiple saxophone parts to create a rich ensemble sound.
Direct Injection: Some saxophonists use a pickup mic or electronic pickup to capture a clean signal for processing.
Hybrid Mics: Combine close and room mics to capture both detail and natural ambience.
Regular Monitoring: Take frequent breaks and monitor your ears to avoid fatigue and poor judgment in mixing.
Troubleshooting Common Issues
Some common problems and solutions when recording saxophone on GarageBand:
Clipping: Reduce input gain or use a compressor.
Background Noise: Use noise gates and minimize environmental sounds.
Muddy Tone: Adjust mic placement, room acoustics, or EQ to clarify.
Latency: Reduce buffer size in GarageBand’s audio settings for real-time monitoring.
Conclusion
Recording saxophone on GarageBand can produce professional results if you follow proper techniques, use quality equipment, and pay attention to detail. From mic placement to editing, every step contributes to capturing the full warmth, expressiveness, and character of the saxophone. By experimenting with effects, taking multiple takes, and fine-tuning your mix, you can create recordings that rival those made in professional studios.
- Questions and Answers
- Opinion
- Motivational and Inspiring Story
- Technology
- Live and Let live
- Focus
- Geopolitics
- Military-Arms/Equipment
- Security
- Economy
- Beasts of Nations
- Machine Tools-The “Mother Industry”
- Art
- Causes
- Crafts
- Dance
- Drinks
- Film/Movie
- Fitness
- Food
- Games
- Gardening
- Health
- Home
- Literature
- Music
- Networking
- Other
- Party
- Religion
- Shopping
- Sports
- Theater
- Health and Wellness
- News
- Culture